QuickTip: Move the Recovery Partition to allow Main Partition to be expanded
Recently, one of my Hyper-V VM’s ran out of disk space on the c drive and I realized that I had the recovery partition right after the main partition and even though I added more disk space to the VM, the available disk space was showing after the recovery partition. I could create a new volume but I could not expand the volume for my C drive. This reminded of an old trick I learnt several years ago to move the recovery partition to a different volume. The trick is to create a new volume at the end of the newly added free space and then use the recovery tools to backup the current recovery partition and apply the recovery image to the new volume. See steps below
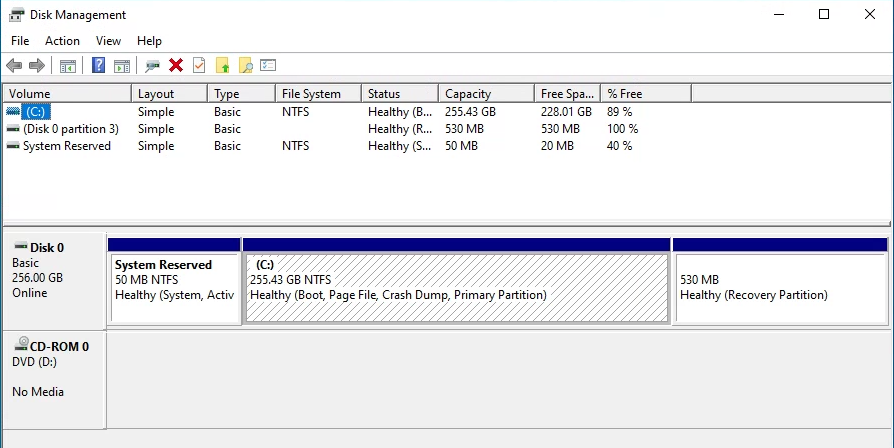
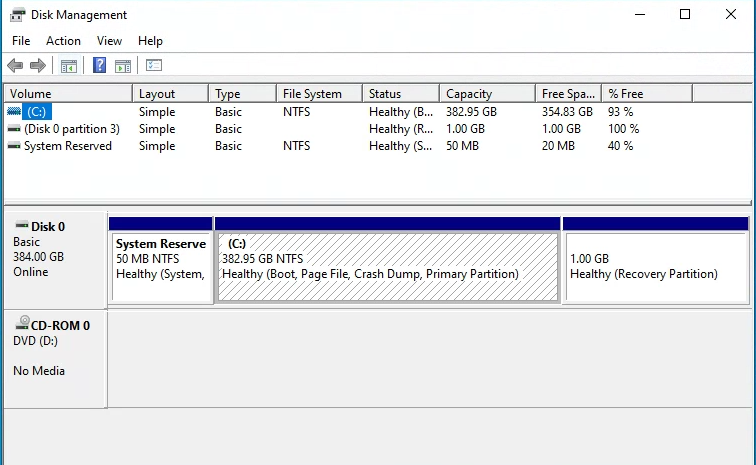
Situation
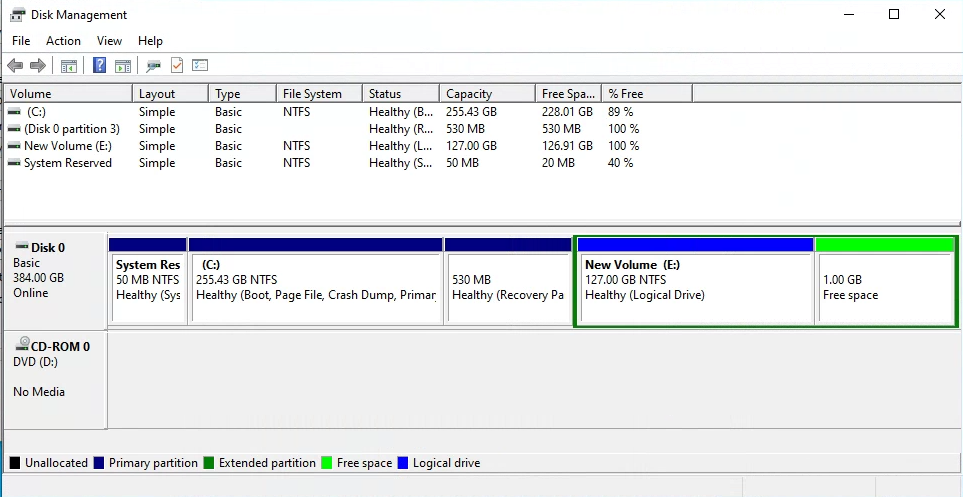
See how the recovery partition is right after the Main volume
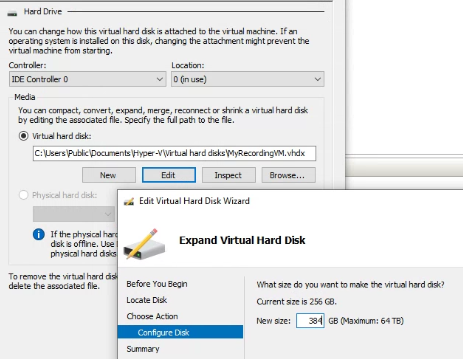
As a first step I shutdown the VM, extended the disk space to the Virtual disk
After the reboot as you can see the additional free space is added but the recovery partition comes in the way
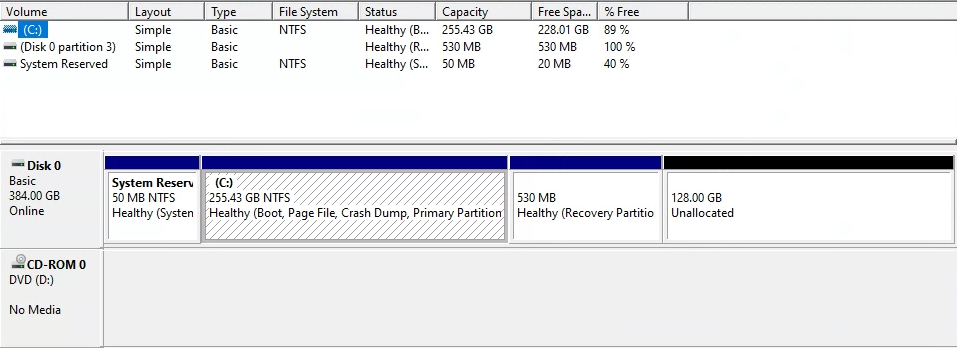
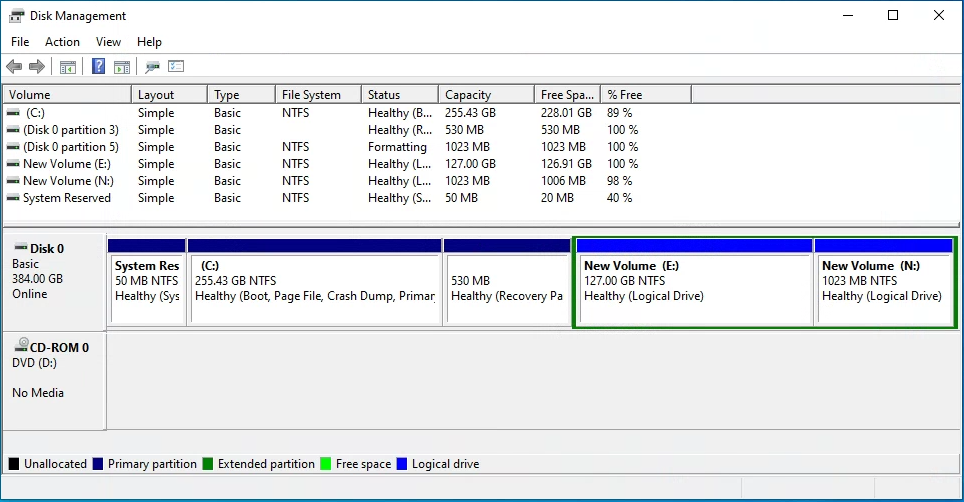
At the stage you will need to add two partitions, one about 1 GB less than the newly added space and we will use that rest of the 1 GB available space to add the new recovery partition.
As you can see I can add 131072 MB space to the partition but I would add 130048 MB Only
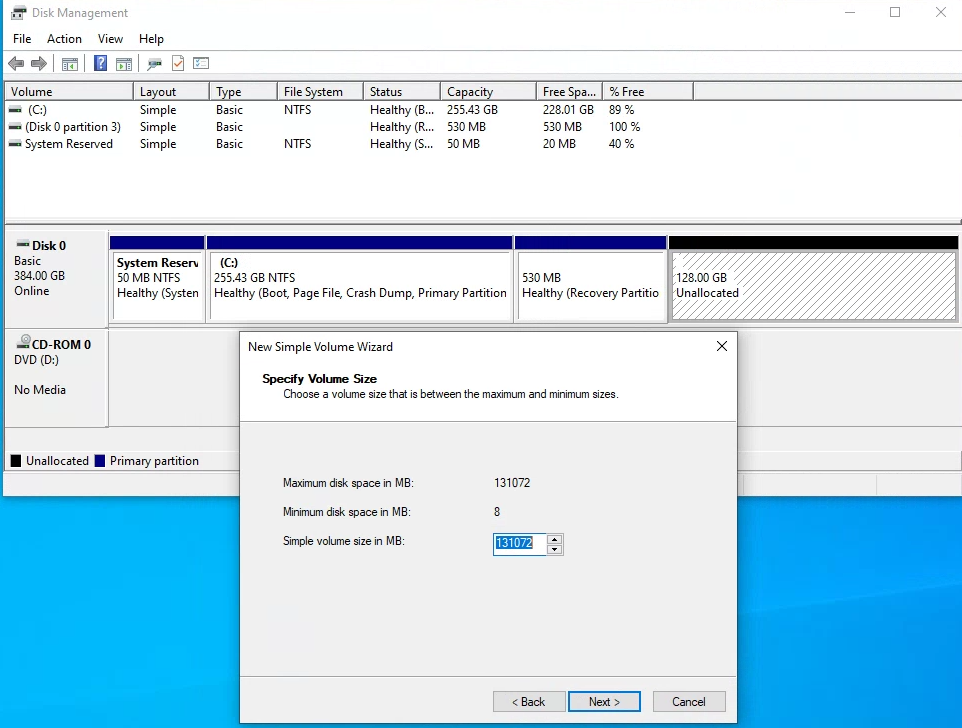
We will add a simple volume with the rest of the Free 1 GB space as N drive
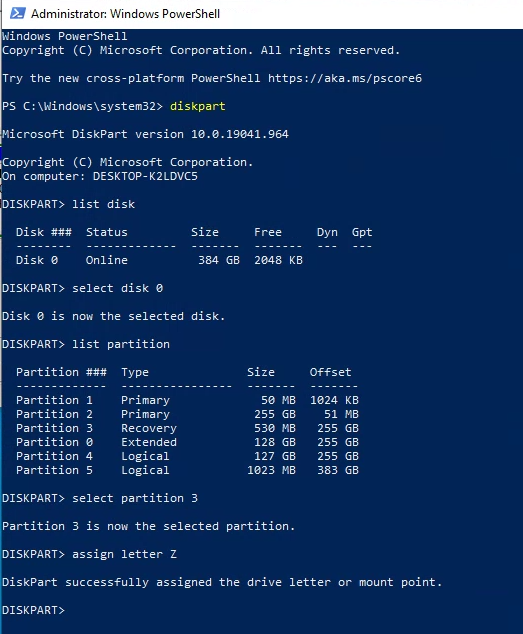
Use diskpart to find current recovery partition and assign a driver letter(eg. Z) to it:
DISKPART> list disk
DISKPART> select disk <the-number-of-disk-where-current-recovery-partition-locate>
DISKPART> list partition
DISKPART> select partition <the-number-of-current-recovery-partition>
DISKPART> assign letter=Z
Assigning drive letter Z makes it simple for us to refer to it in the dism command. Create an image file from current recovery partition:
Dism /Capture-Image /ImageFile:C:\recovery-partition.wim /CaptureDir:Z:\ /Name:"Recovery"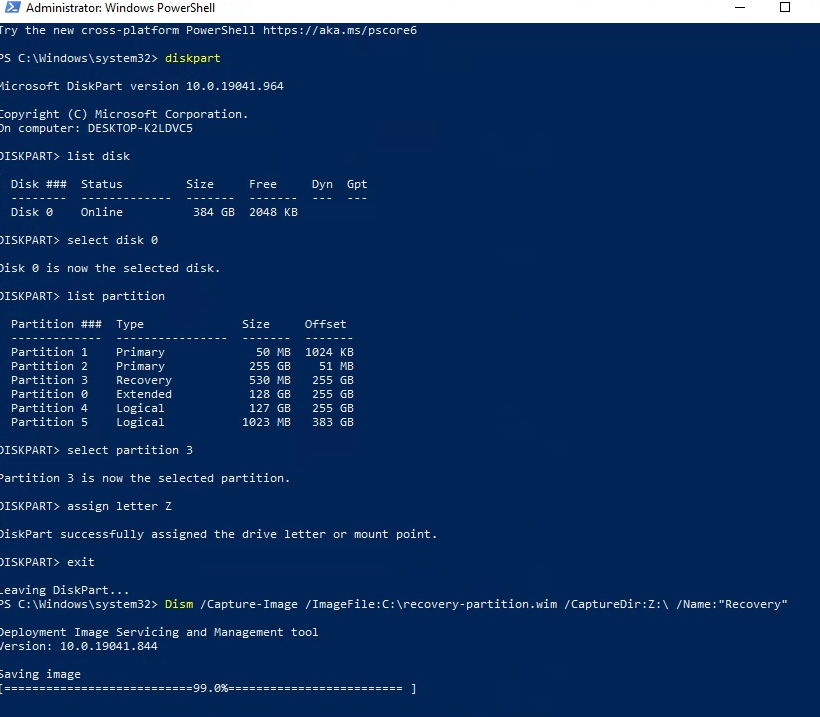
Apply the created image file to another partition(eg. N) that will become the new recovery partition:
Dism /Apply-Image /ImageFile:C:\recovery-partition.wim /Index:1 /ApplyDir:N:\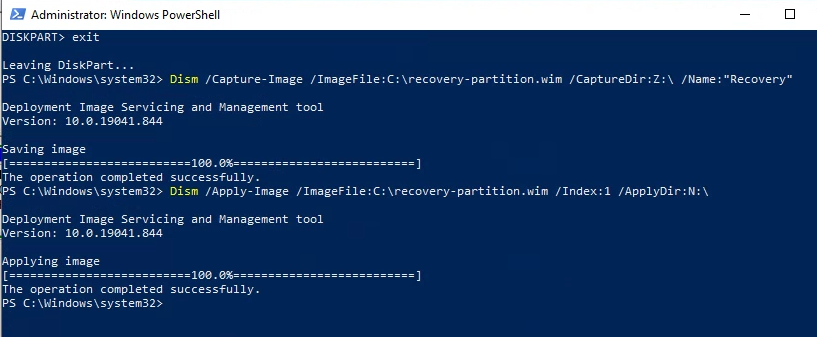
Register the location of the recovery tools:
reagentc /disable
reagentc /setreimage /path N:\Recovery\WindowsRE
reagentc /enable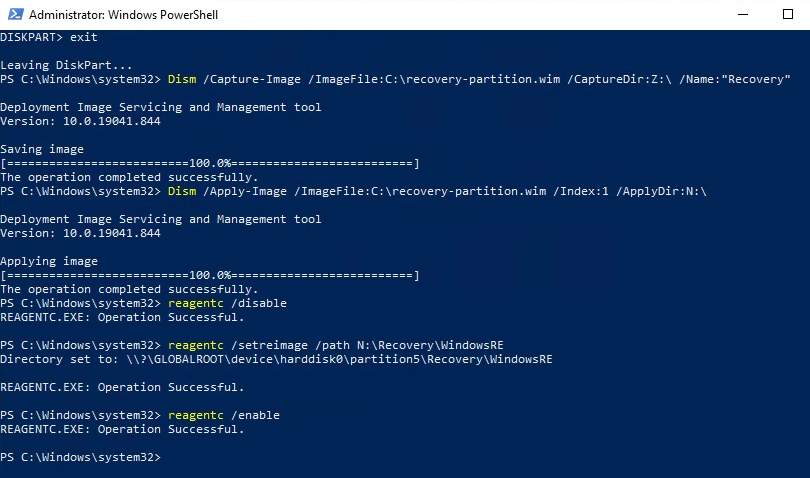
Use diskpart to hide the recovery partition. Since my Hyper-V VM did not have secure boot enabled I would run the BIOS command shown below.
- For UEFI:
DISKPART> select volume N
DISKPART> set id="de94bba4-06d1-4d40-a16a-bfd50179d6ac"
DISKPART> gpt attributes=0x8000000000000001
DISKPART> remove- For BIOS:
DISKPART> select volume N
DISKPART> set id=27
DISKPART> remove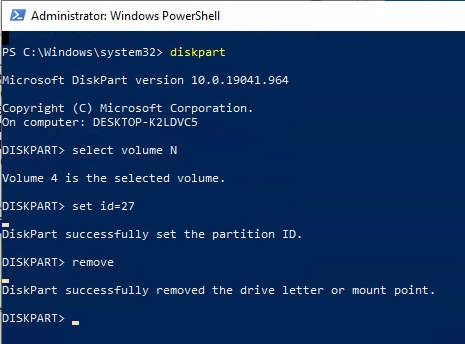
At this stage we must Reboot the computer to ensure the old recovery partition is no longer in use, now the new recovery partition should be working
Delete the old recovery partition, In my case the old recovery partition was 530 MB, I ran the list volume command in diskpart to identify the number and selected the volume 4 :
DISKPART> select volume 4
DISKPART> delete partition override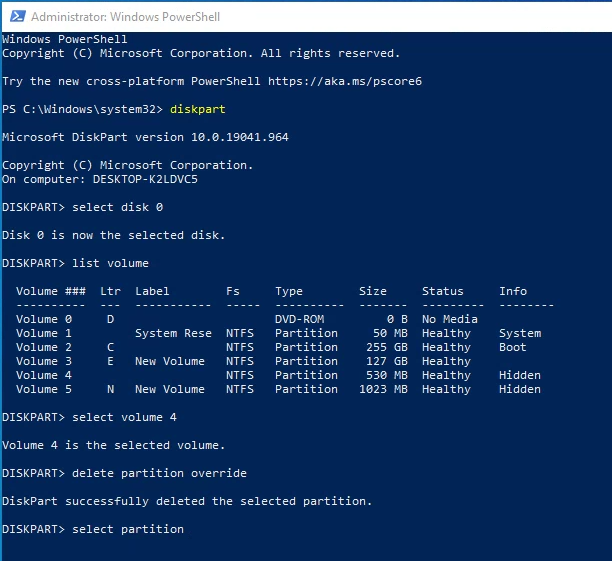
The old recovery partition is deleted and now I can see the unallocated space
Do the same of the temporary 127 GB partition we had created and restart the system after extending the main c drive
Check if the recovery partition is working, Show the current status:
reagentc /infoSpecifies that Windows RE starts automatically the next time the system starts:
reagentc /boottoreReboot the computer and do your stuff in Windows RE (eg. enter CMD and run some tools)